Cardinal in Front of my House

This Cardinal keeps showing up in a tree near the road, right out our front window. I have been trying to catch this shot for a couple of days. I never seem to have my long lens on or ready.

The one time I was ready, I went out the front door, and the bird got spooked, and flew away. Then I got another idea. I removed a screen from one of the front windows, and had my lens at the ready. And then, when the kids yelled “He’s Back!”, I went over, slid the window open, and took this shot.

What is your Primary Lens for Shooting Landscapes?

I got an email the other day asking about lenses I use for landscape photos. I appreciate that someone thought my opinion would be valuable, so I started to send a response, but then thought I might as well respond via a new post. Here is the actual question so we are all on the same page:

I noticed you posted your equipment list on your website and I’m hoping you can provide me with a little advice.  I recently purchased my fist DSLR (Canon Rebel Xsi) and use it primarily to photograph my 2-year old son.  The only lense I have is the kit lense that came with the camera (which is a Canon EF-S 18-55mm f/3.5-5.6).

You take great photos and I really like the landscape photos in your Portfolio (http://www.cyberward.net/photography/).  We spend a lot of time outdoors so, if you don’t mind, what is your primary lense for shooting landscapes?  I’m looking for big, bright colors and crisp, clean images.

First of all, thanks Thomas for the compliment, and congrats on getting a Digital Rebel, so lets take a look at the two questions.

Now this may surprise you, but the bright colors and crisp, clean images can come from your camera. You don’t need another lens for that. The lens has very little to do with color. That has to do with the way your camera is set to convert the image to JPEG. I don’t have a Canon camera, but I am certain that there are picture settings of some sort like portrait, landscape, normal, vivid, etc. I am not talking about the ones on the top dials that modify the shutter and aperture, but settings that control how much color, contrast, and sharpening the camera does. I usually have mine set on vivid or landscape. Play around. Take one picture at each setting and see what you like.

If you don’t have the “Digital Photography Book” (vol 1, II, III) by Scott Kelby, you may want to check them out. Also see my books section.

The second part to this is post processing. Get to know iPhoto, Picasa, Lightroom, Photoshop (Elements), or what ever image editor you have access to. Play with your images. I usually bring up the blacks, maybe a little saturation or vibrancy, something that adds some contrast like clarity or definition, and probably some sharpening. I don’t go overboard, but a little can go a long way.

Again, check out my book section if you want some suggestions on books for image editing.

Ok, you mentioned sharpness. That’s a tough one, because there are so many variables. Your camera technique, your post production, the aperture you pick, and the lens all make a difference. There is more to it than just the lens. Each lens has an aperture sweet spot, and more expensive lenses have larger ones, but I don’t worry about it much. I pick the aperture I want, and let the pixel peepers worry which settings are the sharpest.

I shoot most of my landscapes and my kids with a 17-55 Nikkor. I moved up to it after owning a Tamron of similar focal length, and you can read about that here. Going to this lens over the kit lens gives me the ability to use larger apertures (f/2.8) and focus faster, which is important for kids, not so much for landscapes. I also use my 70-200mm VR Nikkor. I don’t have a wide angle lens, but it is likely the next on my list of things I would like to get. I have used some before, such as the 14-24 f/2.8 Nikkor on a D700 (wow!) and the 12-24 f/4 Nikkor on my D90. I really liked using them, but they take a different style of shooting to get good pictures from them.

I also wrote about the first gear, first lenses, and the first books you might buy in my first posts of this year.

Now, the gear that I wrote about here is Nikon, but Canon, Tamron, Sigma, Sony, etc. all have very similar products. What I suggest is that you rent a lens. We have a great store, West Photo in Minneapolis that rents lenses for a reasonable price.

I hope that answered your question. Fell free to leave comments if you have more questions.

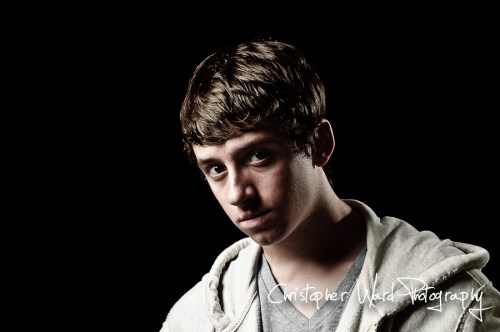
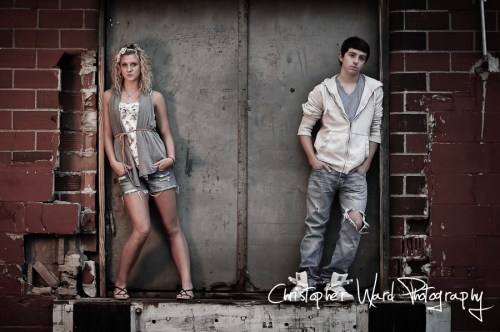
More Portraits of Hanna’s Friends

I don’t tend to mess with my photos too much. I will tweak them a bit to get better color, but I don’t play with presets and such very much. But this photos seemed to ask for something else to me. I didn’t use another preset, I made it my self. I actually started with a black and white, but it didn’t pop quite how I wanted, so I gave this faded, sharpened look a try. This was all done in light room.

I think I will do a post in the future about how this was lit and processed, but that is for another day.

I saved the settings from the other image and made a preset, so I thought I would see what it would look like on some of the other images from the day. I can’t decide for sure how much I like it in this setting. It seems pretty cool, but maybe the regular color images worked also.

It works pretty well with this image I think, and I learned something from this shoot. I need a light on each person, especially when they are this far apart. I like the light on the left, but it was pretty much gone by the right side of the image. I am thinking two lights, both on the same side (left) but with one directed at the right side of the image.

Anyway, here are a couple of more images from that day. Let me know what you think in the comments.

All the images were processed almost the same, with my new ‘fade’ preset. I will get to some images that are in a more normal color in a day or two. Just thought I would play with this look, and these images would be good for that.

Wood Lake Nature Center Part 2

I arrived at Wood Lake Nature Center before the sun started to set, but not by much. I did find some interesting shots as I walked around. There were a few ducks and geese, but not as many as I expected.

The reflections on the water of the dried grasses and the low light make for a pretty cool shot. Otherwise it is just a shot of a duck. Here it is just a shot of a duck on a cool reflection.

A long time ago I took a picture of a bolt on this same bridge. Probably not the same one, but I like the set up for this. It is shot with an aperture of 2.8 which sends the grass and trees in the background into a nice impressionistic color blur.

This time, shooting with a medium aperture of 5.6, the evening light on the reeds makes for some nice images. I didn’t stop the lens right down to 2.8, so that the background would show some definition.

Right when I was taking this a family walked by. They were having the darndest time trying to figure what I was taking a picture of. They kept looking into the distance, and back at me. Then one of the kids asked to look. I let them try to hold my camera with battery grip and the 70-200. I don’t think they ever saw anything through the viewfinder, but they happy to have tried.

Nothing much interesting happened with the sky that night. No clouds, no color, nothing special. I decided to use the sun reflected in the water instead. I also warmed the white balance up a bit to get the gold color like the other images.

Wood Lake Nature Center

Last weekend I went to the Wood Lake Nature Center in Richfield. I took quite a few shots, but I have been sick the last few days, and just didn’t get around to getting a post up. Here is the first of the images from that little outing. These are all of this little bird. It is mostly black with just a little red color on it’s wing. Smaller than a crow. This is the Red Winged Black Bird.

I went as the sun was going down, and I only saw a few people. I soon had the place all to myself.

There are paths that navigate the entire lake, and a floating foot bridge that crosses the middle of the lake. This is a great place to take pictures. I even saw a muskrat around the the bridge, but couldn’t get a picture.

This bird species, some ducks, and a few noisy geese were the primary animals I saw.

For those that know me, don’t worry, I did get some pictures of ducks. I will post them later.

First Cardinal of the Season

This isn’t the first Cardinal I saw, or heard this season, but it is the first that I tried to capture via lens. I admit that I really don’t have the lens for capturing an animal this small, and I had to crop this a fair bit, but it still looks pretty good.

One good reason to shoot early in the spring is the lack of leaves on the trees. These guys like to hide in the trees, not out at the edge. Even in this picture, I still have a shadow on the singing bird, even with the lack of leaves.

Food Shoot with Strawberries

I had some strawberries in the fridge, and I thought I would take a shot at taking photographs of them. The leaves are a little past perfect form, but they worked. For all of these shots, I shot near a window with lots of indirect light. I used no flash. A bit different for me, but thought it would be a good exercise. I also had two kids hanging around wanting to spray things with the spray bottle of water I had out.

The shot above has the berries on a low table out a few feet from the window, so that I could fit between. There is a white poster board with a sheet of Plexiglas on top. The reflection is not very evident with the white background, and that is what I was looking for, so I switched to black.

Now we have black poster board, with the Plexiglas on top. I lowered my angle a bit on this shot too. I like the reflection here. You can also tell just how important (and difficult) it is to get the Plexiglas clean. I could get that in Photoshop, but for this exercise, I didn’t feel like it. I then wondered what it would be like to bounce some light in from behind with the white poster board.

This is still the same black poster board with Plexiglas on top, but the color that we got from them is quite a bit different when we added the white reflective surface from behind. I am not sure which on I like better.

One thing I would do different next time, is go for more depth of field. I would need to get more than the f/4 that I used. To do that, I would need a tripod. I was being lazy. These shots are using ISO 400 and 500, with shutter speeds of 1/45th to 1/15th of a second. That is really to slow to hand hold, especially if you wanted to get more depth of field.

This was just a quick project I did in between family activities. Next time, a tripod, and maybe see about lighting it with flash.

Skateboarding at Minnehaha Park

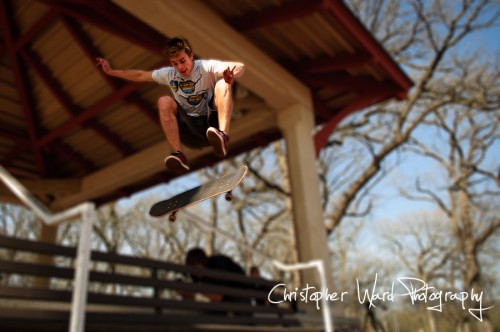
I was at Minnehaha Falls Park this last Saturday to take some engagement photos, but that fell through. I saw some guys go by on skateboards, one carrying a video camera, another a tripod, and I was intrigued. I headed over. I talked with Nick, the video guy, and he said I could take some stills, so I set up.

I was able to take some shots with no flash, but catching the guys going in and out of shadow from the pavilion wasn’t working. I set up a SB900 on camera as commander, and a SB900 as off camera remote. I really needed more light. Maybe using two, maybe adding some actual flash from the on camera light, but I had it directed at the off camera one. I didn’t use a softbox, just the bare light, sometimes gridded with a Honl grid. Neither worked great, because the beam of light was fairly narrow. The guys didn’t always jump from the same spot, and I wasn’t on a tripod. Sometimes I got a good flash, most of the time, I didn’t.

That image worked pretty well with the flash, but I still needed to lighten him a bit with the adjustment brush in lightroom. I needed bigger light, or more speedlights. This shot is with the skater coming from dark into sunlight. To make him pop I needed something more.

Also, I was using my 17-55 f2/8 lens, most of the time at f/4.0. Since I was relying on the camera’s dynamic autofocus, and the skater coming somewhat toward me, I wanted a bit of leeway in the focus plane. Unfortunately, at f/4 at wider apertures, I am getting tons in focus in the background. I took one image into photoshop to blur the background. Not sure if I like it, maybe I over did it, but he does pop.

I was also playing around with a gritty black and white look. I converted to B/W in Lightroom, and then added lots of clarity and grain, which is new in the Lightroom Beta’s. I think it kinda looks like old shool skate rags, but that could also be wistful thinking.

I took a ton of shots, and came away with about 30 that I posted. I was going to host them here, but really, I need a new section on this site to do that, so for now, I decided to post the images on Flickr in this Skate set. I’ll probably get them hosted here soon. I also put a few on Facebook here. It should be a public album.

To the skaters, thanks for indulging me. I would be happy to get together and try again if you would like to. If you want to leave your name, I would be happy to give credit to the skaters in the images. Sorry, I really should have written those down. If anyone wants an image in B/W or color, let me know.

I also took a few bits of video on my D90, and want to get that into something. Check back in a bit.

Aperture 3 vs Lightroom 3 Beta 2

My first photography “library” program was Aperture 1.5. I bought it right about the time I got my first DSLR, the Nikon D40. I wanted to shoot raw, and needed something to process the images. I wanted to be able to file, sort and tag my images. I set out to evaluate Lightroom and Aperture. My results were here.

Aperture was working will for me, but then I got a little more demanding in my image processing, and that’s were I ran into trouble. Now, I am sure there are others that were incredibly happy with the editing tools in Aperture 2, but I wasn’t. I started to process the images that I most cared about by opening them in Photoshop. Then I decided I wanted to use Camera Raw, and needed to go find the actual NEF file first to open it in Adobe Camera Raw before opening them in Photoshop. I didn’t often need to use Photoshop layers and such, but I did every once in a while. Mostly I just like using Camera Raw.

That’s when I discovered that Camera Raw was the engine behind Lightroom. It was a library and UI with Camera Raw doing the image manipulation. Hmmmm…. So I did a trial of Lightroom, and then bought a copy of Lightroom 2. I was still using Aperture 2 for some things like Books, which Lightroom doesn’t have an answer for.

Now, I was fairly happy with Lightroom 2, but when Apple announced Aperture 3, I was thinking I might be headed back. The upgrade price wasn’t too much, so I went for it. I should have just done a trial. I had issues with it right from the start, but maybe you won’t. I will try to compare the two programs, only bringing up my issues with Aperture 3 at the end.

So, here I will try to compare what I like and don’t like about Aperture 3 and Lightroom Beta 3. For this comparison, I use past experience, and two events that I did where I processed a wedding on Aperture 3, and another party on Lightroom 3 beta.

1) To start with, I still like the library organization of Aperture better. I like folders. I like being able to group projects, books, slide shows and whatever else into a folder. It keeps things together. I had got used to the collection method of Lightroom, and how separate it keeps these virtual folders from the actual image location. For a while I thought it seemed fine, but when I went back to try Aperture 3, I realized I missed it.

2) In the beginning I was put off by the Modules in Lightroom. I felt that it was a bit restrictive. In reality, it was just fine. I got used to it quickly. Now in Lightroom 3 Beta, you have more access to your images in the Develop module (collections), so that area is improving as well. The floating Inspector in full screen mode in Aperture is pretty nice though. Full screen mode in Lightroom is a great feature, but I wish it had a floating window like Aperture. Yes you can remove all the other side bars, but it’s not the same.

3) I still like the Develop Module of Lightroom better than Adjustments in Aperture. Aperture 3 is much improved. Some of the deficiencies in V2 to Lightroom was the gradient tool, brushes, and presets. Aperture 3 added the brushes and presets which was welcomed. I still feel that I can adjust an image to better results with brightness, clarity and a touch of vibrance than I can in Aperture with exposure, definition, and a touch of vibrancy.

4) Brushes are a great Aperture 3 addition, however I find it much easier to add and adjust presets in Lightroom. I like the ability in Lightroom to adjust the brushes. I have presets, but I can tweak them as I would like. I have not figured that out in Aperture yet. I also just like how Adobe has laid out out the menu system for applying presets and brushes better. To me, the masking in Lightroom seems better than in Aperture. It might be subjective, because I wasn’t using the same images, but it just seemed to work better in Lightroom on the images I used it with. Also, I use the graduated filter on sky’s all the time. This is something that Aperture should implement.

5) I like the ability to move the linear points on the histogram in Aperture. I would often pull in the endpoints on an image that maybe didn’t get shot with quite enough light range.  I missed this in Lightroom, but after figuring out how to use the tonal curve, it is probably a wash, but moving endpoints in a little bit in Aperture is really easy. On the other hand, I am starting to use the ability in the Tone Curve and some of the other blocks to adjust while moving the mouse on the image. That way you select the tones you want to adjust, and Lightroom moves the tone curve. That is pretty cool. That was there in Lightroom 2.

6) Books. Aperture has, Lightroom doesn’t. Some people don’t care, but I like the layout engine in Aperture. I wish it had a few more features, and made it easier to export to my own book printer, but that may come. There is now the ability to for plug-ins to work with it. It would be nice to be able to create custom templates that you can save off, but there are only really hacks for this that involve saving copy’s of existing books, and swapping out pictures. I do use the book feature, and if I am sticking with Lightroom, will still keep Aperture around for this function.

7) Printing. Lightroom has been much better than Aperture in this regard. The print module in Lightroom 2 is great, and is a little improved in Lightroom 3 beta. I don’t print much from my own machines, but I have used it to create print layouts and print packages that I have exported to jpegs that I have had printed elsewhere. You have great control over layout with Lightroom. There are a few tricks to getting it to work. I was glad that I had purchased Adobe Photoshop Lightroom for Photographers by Scott Kelby.  Aperture 2 has very basic printing ability. You couldn’t print different images on the same page. Aperture 3 has improved the printing ability, but I still don’t think it can match Lightroom. If you print a lot of your own images, you should probably look into this a bit more.

8 ) Slide shows. Lightroom 3 beta added the ability to match the time of the slide show to the length of the song. It will automatically adjust the length of each slide to match the song. this is very cool. Aperture 3 has a feature that allows you to press a button in real time to adjust the length of time the image is displayed. This sounds better than it works in real life for me. Maybe I just need more practice. On the other hand, the control you now have over the Ken Burns theme is amazing. You drag rectangles (like cropping rectangles) on the screen to specify the start and end sizing for each individual image (if you want) to get great control on how the image moves and expands. This works really well. This extra control is definitely a plus over the slide shows that Lightroom supports.

9) Web Galleries. I can’t say much about this. I keep thinking that I will use these features, but I don’t. I end up exporting my images and using custom javascript or using gallery software like Zenphoto. I end up exporting my images and FTP’ing the images myself. I have played with the built in galleries a bit, and some of the galleries that Lightroom has look pretty nifty. Neither seemed to have the perfect gallery for me. I looked at the effort it would take to create a custom gallery, and it looks like some are available for Lightroom  and that it would be the easier of the two to actually create a custom one.

10) Because I don’t use the web galleries, I need to get my images somewhere. To do that, you need to export them. There were several places I would put images, including Flickr, Facebook, and websites. With Aperture 2, I would export images separately, then use the Flickr uploader. With Lightroom 2, I found a Flickr plugin that I could use to upload the images directly. One of the issues though, is trying to keep track of images that you had already uploaded. I tried to add a flickr keyword to my images, but often I would forget. Aperture 3 and Lightroom 3 beta have improved upon this situation. They now let you create a linked folder/collection to these services. This allows you to see what has been uploaded, revise flickr images (with pro account), and sync new images. Unfortunately both programs give you very little control or options. I would like to be able to specify a set, for example when uploading to Flickr. Another issue that I had was with watermarking. I would on export use a plugin to put my name and a border on my images. Lightroom 3 has improved it’s exporting function so that you can apply watermarks whenever you export now. That is welcome.

11) Faces and Places. Aperture wins her. I don’t know how many professional photographers will want to use Faces. I find it a nifty tech, but haven’t committed to it. Probably because I haven’t committed to Aperture. I apply tags to photos of family members names right now. For my other work, I don’t tag them with names. I think it would be a better way for dealing with family photos though. The GPS integration is another story. I have yet to get a GPS device because it seemed like such a hassle to deal with the GPS data. Lightroom does have a couple of plug-ins, but I haven’t tried them. Aperture is the first with a out of the box solution. I imported some iPhone pictures, and also tagged some of my other pictures on a map. I thought it worked well. I like the map view. I think this is a great step. I would definitely think about getting a GPS unit if I am using Aperture long term.

12) Video is slowly starting to become more a part of a DSLR shooters workflow. I was quite excited to see that Apple has started to address this. It works pretty well. Aperture imports the clips with your other photos, and applies your metadata. While viewing your images, you are able to view video clips, and can even adjust the start and end points. What would be fabulous is if you could adjust the clips. Right now no editing is possible. Lightroom Beta 2 has a first glimpse at dealing with video. Before this second beta, Lightroom would tell me that it had files it couldn’t import. Then I had to go move them to another location my self. I have forgotten to do that more than once, before formatting the card. Lightroom’s version doesn’t allow you to view the files or trim them. They will open in a default player however. Better than nothing. I have seen a demo of how CS4 Extended will allow you to take an adjustment layer an apply that to all frames in the video, even as the objects move through the frame. That would be super cool to see in a future Lightroom version.

Ok, so where am I at? First of all, Aperture is almost unusable for me. It is very frustrating. I get distorted images, where they turn green, or pixelated, or have a big X across them. This started when I was using Aperture 2, and from what I have heard on the web, was probably about the time I upgraded to Leopard. I still  have issues with V3. I haven’t used it as much lately because of it, but it seems like the issue is becoming less frequent.

Second, Aperture 3 is slower than Lightroom 3 beta. Especially on images that have used the new brushes. I have a 3gig 2.2 iMac. It’s almost a couple of years old. I am careful to close all that I can when I am running Aperture or Lightroom, but the issue is most obvious on Aperture. The computer becomes unresponsive. It appears to be processing something, but there is no message, and no ability to interact with the program.

I still feel more comfortable with, and feel like I can get better results using the develop module from Lightroom, and it’s brushes than I can with Apertures adjustment panel and it’s brushes.

To me, Aperture wins some of the “extra” categories like Faces, Places, Books, and handling of video. There are also some parts of the library functions I like better with Aperture, such as the combining of items into folders. I am getting used to how to use Collections in Lightroom however, and I am liking the key wording area too. One little nicety of Lightroom is the little arrows to the right of items in the library. These arrows usually bring up some extra information. The ones I like the best are the ones dealing with files and the file system. When in a collection, if I want to see the Lightroom folder where this image came from (if I am looking for other similar ones) there is a button next to “folder” that will take you right there.

So right now, I fell like I want to use Aperture, but will be sticking with Lightroom, and upgrading to v3 when it comes out. I will be keeping Aperture around for using the books feature. You may have different conclusions, but those are mine.

If you have a Mac, I recommend giving each a solid couple of weeks of a free trial with real images, and see how things go. You get to make your own decision.