

So, what does the Camera Connection Kit come with for $29.95? A SD(HC) card reader (left), and a USB adapter (right) that plug into the iPad. Seems a little high for what you really get, but hey, it’s the only option right now.
I tried both connections, and they both worked when done as intended. You can take images off your cards, and you can connect your camera via USB cable. However, you can’t connect a hard drive, and I couldn’t find a way to put images from the iPad onto a card. It appears to be a one way deal. iPad as a data consumer again.
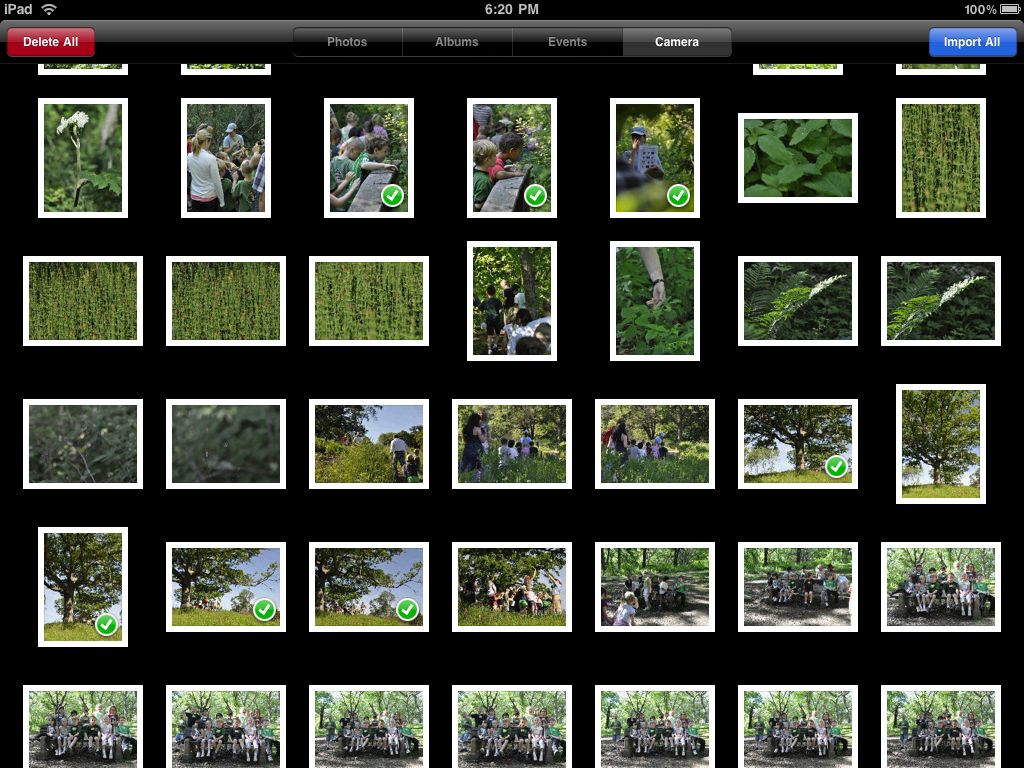
When you connect a card or camera, you get the photo’s screen with a camera tab. The screen quickly fills up with dashed outlines for the images on your camera (or card) and then starts to fill in thumbnails.

There are now buttons at the top for “Delete All” and “Import All”. Once the image thumbnails are there, you can choose which images you want to upload to the iPad.

By clicking on a thumbnail, you can select individual images to import. You can flick up and down with your finger to scroll through all the images. These thumbnails are from my daughters field trip to a nature center this week.
Notice the buttons at the top changed from “Delete All” to “Delete Selected”, and “Import All” to “Import”.

Pressing the import button brings up a little drop down where they give you the option of importing all again. Not sure why this is necessary.

The screen shot above seems weird to me. This is where I ended up after doing my selective import. I guess we are here because there are sill possible images to upload, but with items still having that green check box, it is hard to tell if they are selected or imported all ready.

I pressed the Albums tab to get to the screen above. Notice that I now have a “Saved Photos” album with the screen shots I took, a “Last Import” album with the images I just imported, and a “All Imported” album that would have everything I had imported and not erased off the iPad.
What is think is cool about this, is that the images are NEF files. They are Nikon RAW image files, and they show up on the iPad. What I don’t know, is what you edit when you use a program like Photogene. Are you using a built in preview contained in the RAW image, or is the iPad converting. I am leaning to the preview, but it seems to be full size, which surprised me.

You can then get the images off the iPad as if it were a regular camera. Just connect your iPad to your computer via the sync cable. These images won’t transfer via iTunes, you need to import them. I tried Lightroom, iPhoto, and Image Capture on my Mac. The RAW files come off just fine, as if they were transferred directly from your card. One interesting thing I found, was that I couldn’t transfer the screen shots using Lightroom, but they showed up in iPhoto when I tried that. Strange.
So, the question going around seems to be whether this can replace field back up units like ones made by Epson and others. I am not so sure. The screen is big and gorgeous, but it is also big. I think the smaller units while having a smaller screen are more rugged and compact, but I don’t own or use one, so I can’t really comment. What I think would be ideal would be an iPod Touch or iPhone that you could connect this to AND a laptop hard drive or other SSD drive to make a backup to. That would be much smaller and eliminate the need for a laptop in many travel situations. But that is just wishing smoke.
Anyway, it looks like a fun accessory to play with, and I will experiment with using it as a backup device when traveling.